Temperature on the development of organisms
Independent variable: Temperature
Dependent variable: Number of brine shrimp hatched OR number of seedlings
germinated
Equipment list - Brine Shrimp
- Brine shrimp eggs
- 6 beakers
- Marker pen
- Water baths and refrigerators at the following temperatures: 15°C, 20°C, 25°C, 30°C and
35°C
- Thermometer
- Sea salt
- Weighing scales
- Measuring cylinder
- Spatula
- Dechlorinated water
- Stirring rod
- Graph paper
- Scissors
- Magnifying glass
- Forceps
- Pipette
- Light source
Equipment list - Seeds
- Seeds
- 5 petri dishes
- Marker pen
- Water baths and refrigerators at the following temperatures: 15°C, 20°C, 25°C, 30°C and
35°C
- Thermometer
- Cotton wall
- 50 cm3 measuring cylinder
- Distilled water
Ethics
When handling living organisms for scientific research and learning it is important to treat them
with care and to minimise potential harm. When using organisms experimentally as a student
you have a responsibility to gain as much advancement in knowledge and learning as possible
from them. The availability of the organisms you could use in this experiment should be
considered, since those easier to obtain will make increase the practicality of the research.
Method
Method 1 - Brine Shrimp
1. Use the marker pen to mark 5 of the beakers with the following temperatures: 15°C, 20°C,
25°C, 30°C and 35°C
2. Use the weighing scales and spatula to measure and weigh out 2g of sea salt into each
beaker, followed by 100 cm3 of dechlorinated water. Stir the mixture with the stirring rod in
order to dissolve the salt.
3. Dampen some paper with the salt solution and place a pinch of brine shrimp eggs on to the
paper. Use a magnifying glass to separate and count the eggs until you have roughly 40 on
the paper.
4. Cut the paper around the eggs so the size of the paper is smaller than the area of the 5
beakers prepared, then place the piece of paper eggs-side-down into one of the beakers.
Allow 2-3 minutes for the eggs to fall off the paper and into the beaker, finally removing the
paper from the water with tweezers or forceps.
5. Repeat steps 2, 3 and 4 for the remaining 4 beakers.
6. Place the marked beakers into the water baths and refrigerators that correspond the
temperature written on them and leave them for 24 hours.
7. Prepare the sixth and last beaker as described in step 2.
8. Remove the first beaker and use a bench lamp or other light source to shine light into the
beaker, causing the brine shrimp that have hatched to swim to the surface. Use a pipette to
remove the shrimp one at a time, placing them into the empty sixth beaker as you count
them.
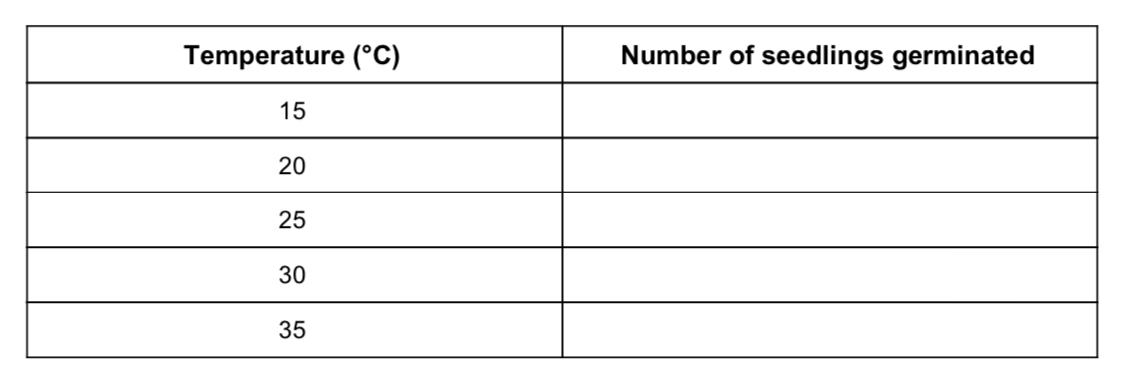
9. Record the number of brine shrimp that have hatched at that temperature in a results table
and place the hatched shrimps in a location as instructed by your teacher.
10. Repeat steps 8 and 9 with the remaining 4 beakers.

Method 2 - Seedlings
1. Use a marker pen to label 5 petri dishes with the following temperatures 15°C, 20°C, 25°C,
30°C and 35°C
2. Mould a 1 cm layer of cotton wool into the bottom of each petri dish and place 20 seedlings
on to the petri dish, using tweezers or forceps. Spread the seedlings out so they are evenly
distributed across the dish.
3. Use the measuring cylinder to slowly add 30 cm3 of water to each dish and then place each
of the marked Petri dishes in their corresponding temperature environments.
4. Every 24 hours, add more distilled water to each dish so the seedlings and cotton wool
does not dry out. Be sure to add the same volume of water to each dish.
5. After 5 days remove the Petri dishes from the water baths and refrigerators and count the
number of seeds that have germinated for each temperature, recording the results in a
suitable table.

Graph and results table
A graph can be plotted of temperature against the number of brine shrimp hatched / seedlings
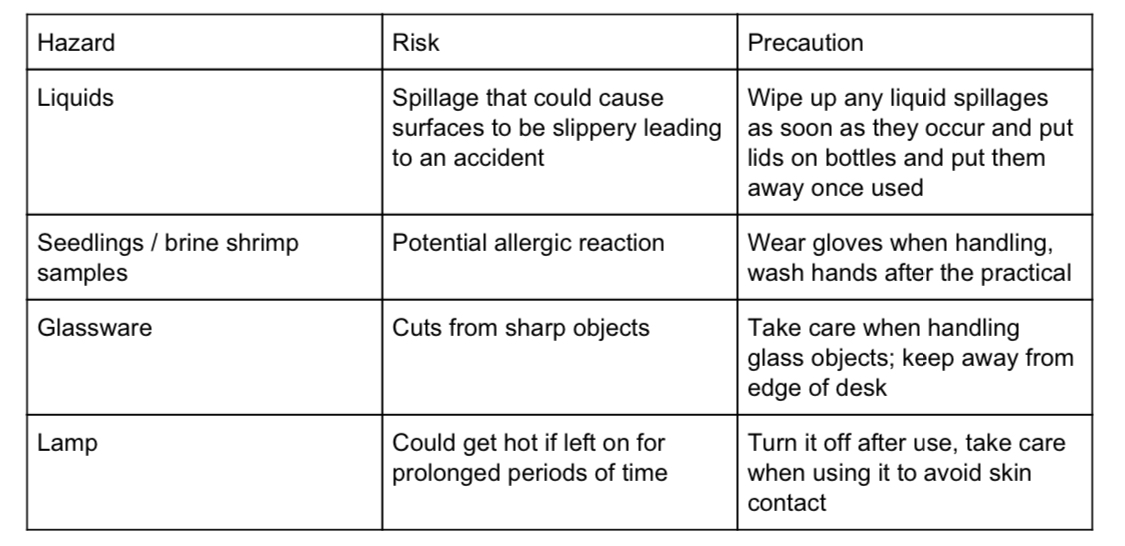
Risk assessment

